Dinner Bar-Style Bench
Built in 2017, Jan 5.

Final Look.
I built this because we wanted our house to be industrial style (still working on it) and we thought it'd be cool to have a "bar-like-style" seating. We also tend to have a company over at our house quite often and need a dining area that can seat 10 people comfortably if necessary. I made two of these and each one seats 3-4 people comfortably.
The front legs are made of 4x4's in which I tried, for the first time, notching them. These joints provide a lot of column strength which I thought was a must with 4 people sitting on one bench (gotta get ready for the fat relatives who might drop by during Christmas). The back legs are two 2x4's cut to length. One 2x4 supporting the weight of the frame while the other extends for the back rest.

Starting to install into the dining room.
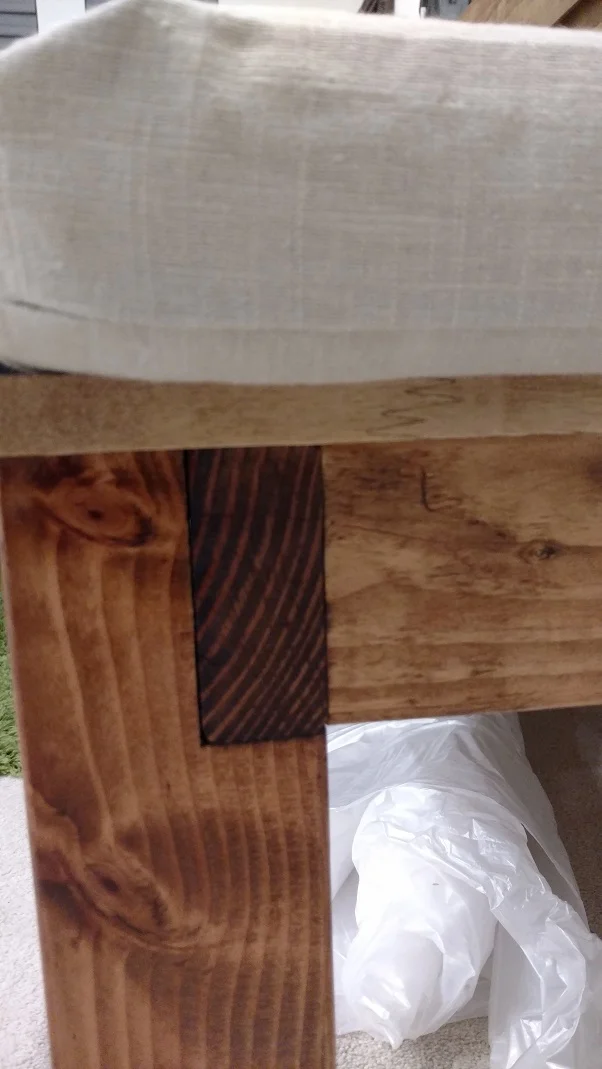
Notched 4x4 to take the weight of the frame. Rather than apply severe shear forces screws.

Back seating up! Time for rear shelf!
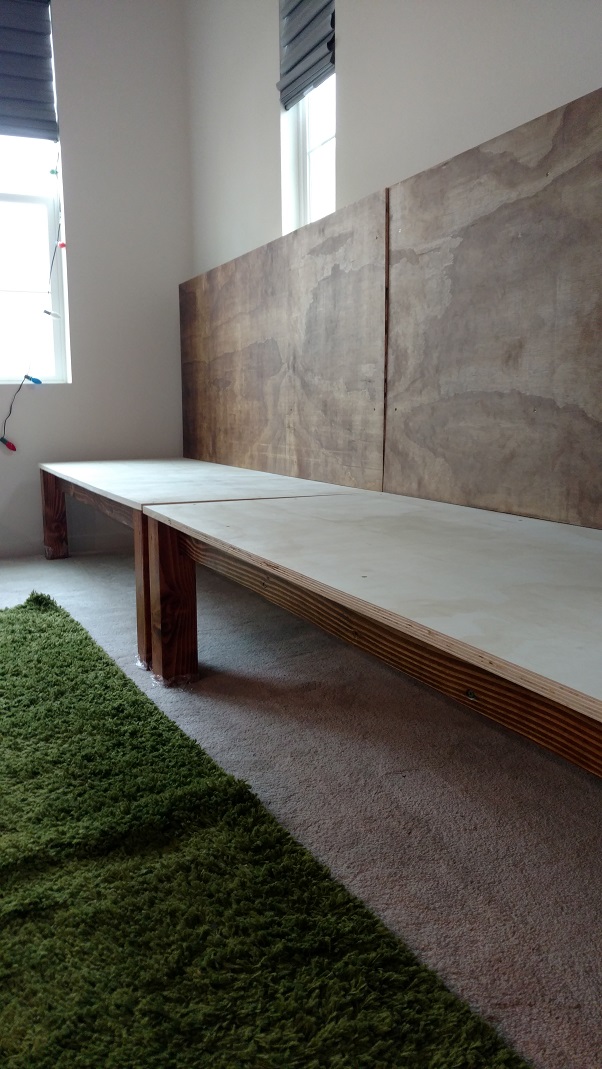
We also wanted to be able to put decorations behind the bench so I made a back shelf. I didn't want anything to fall off and hit any seaters on the head so I made the side-wall 4" originally. This was way too tall and limited the view of decorations. I ended up cutting it down to 3/4" in the end.
Almost there...

Installed a back platform to hold decorations.
Since I used plywood for the seats and back, I used the iron on vineer to cover up the plywood look. Lastly, I covered up the guts in the back with a plywood piece. Hope you enjoyed this build. I learned a lot. This is the first time I used torx screw. I don't think I will use anything else in the future. These screws do not slip at all.
For color, I used dark walnut danish oil from Watco. There was a learning curve on how to apply it correctly. I had to do a fair amount of sanding before the final coat to make sure all the excess stain was gone since I had originally applied too much. Good thing is, not many people will actually be touching the surface but rather pillows and the cushion.
This was Tammmy's first sewing project and we bought 2" thick foam and cover material from Joann. She also hot glued batting to give the cushion a rounded look. These looked super nice and were great for the price! A little tip though, off-the-shelf foam comes in limited widths unless you plan on taking from a big piece. I would defintely recommend getting at least the foam first before doing this build so that your seats fit well.

Tammy trying out the cover's fit over the foam.

Coat Hook from Home Depot
